Hello there, warm Welcome :-) I am trying to share the knowledge and cool things I learnt during my QA journey!! I hope you find something interesting here :-)
A simple way to view and segregate the complex JSON Hello Peeps, Welcome back to another blog 😉. I hope everything is going well for you. Many people prefer the JSON format for APIs, databases, and other applications for a variety of reasons. Some JSON requests or responses are simple and only contain a few objects. On numerous occasions, you may be required to handle a complex response. I wrote a blog about parsing complex responses before using https://jsonpathfinder.com/ In most cases, however, you will need to further investigate your JSON payload or responses for various reasons and analytical purposes. Are you a visual learner or a fan of mind maps? Then you will undoubtedly fall in love with this tool ❤️ JSON Crack I recently came across this tool and found it’s worth sharing with the community 👓 Once you land on the home page, click “GO TO EDITOR” Now you will see a sample JSON beatified and visualized. To visualize it, clear the left side pane and paste your JSON. For in...
We can discuss about the basic request building part in Postman.
HTTP (HyperText Transfer Protocol) is the protocol used to send and receive data over the Internet. When you make an API call, an HTTP client sends a request to an HTTP server, which then sends back a response with the requested data to the client.
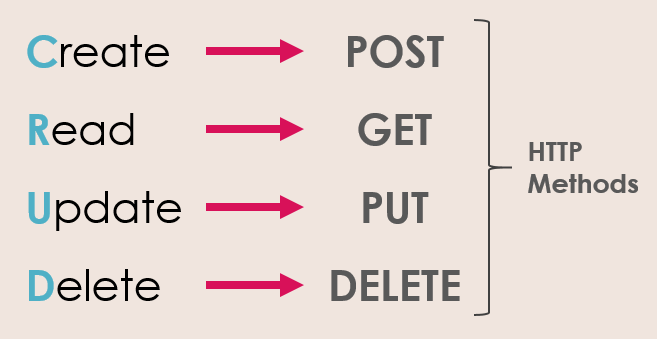
An HTTP request is an action to be performed on a resource identified by a given Request-URL(baseURL). Request method names are case-sensitive, and should always be denoted in upper case i.e GET, POST etc.. There are various HTTP request methods with specific purposes, we use different methods for different API actions.
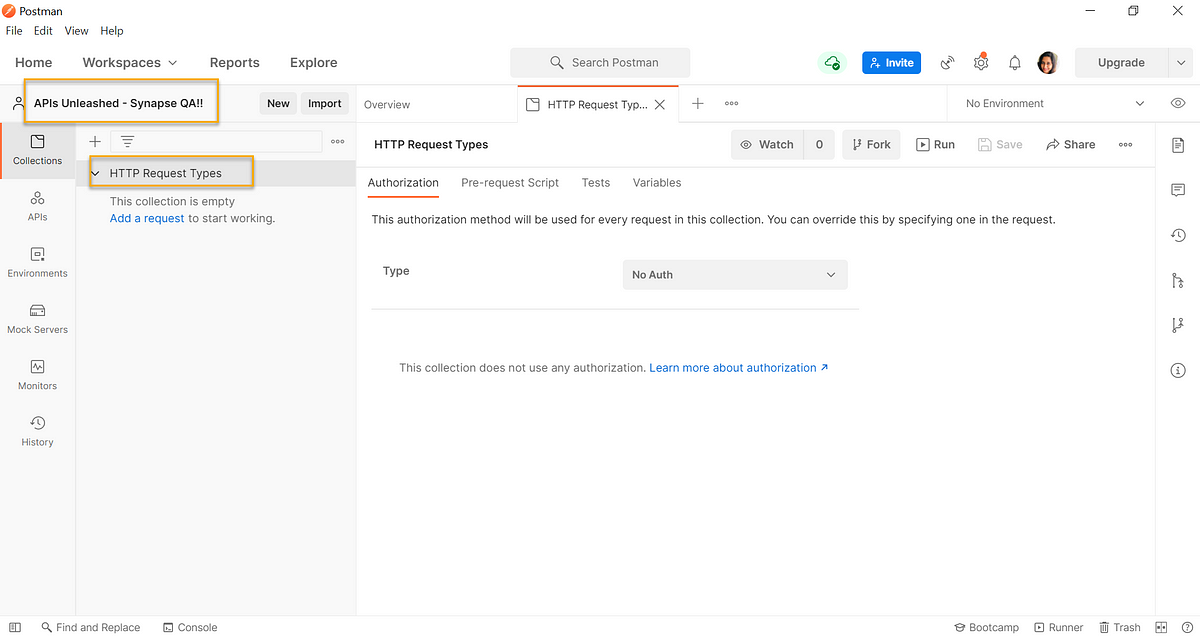
Once you read through the Postman 101 blog, you will now have an idea on how to create Workspaces, Collections and Requests.
HTTP Requests are nothing but the action of the API.
Once you have your collection ready, you can directly go ahead and add the requests inside it.
We will now see how to add different request types under the same collection.
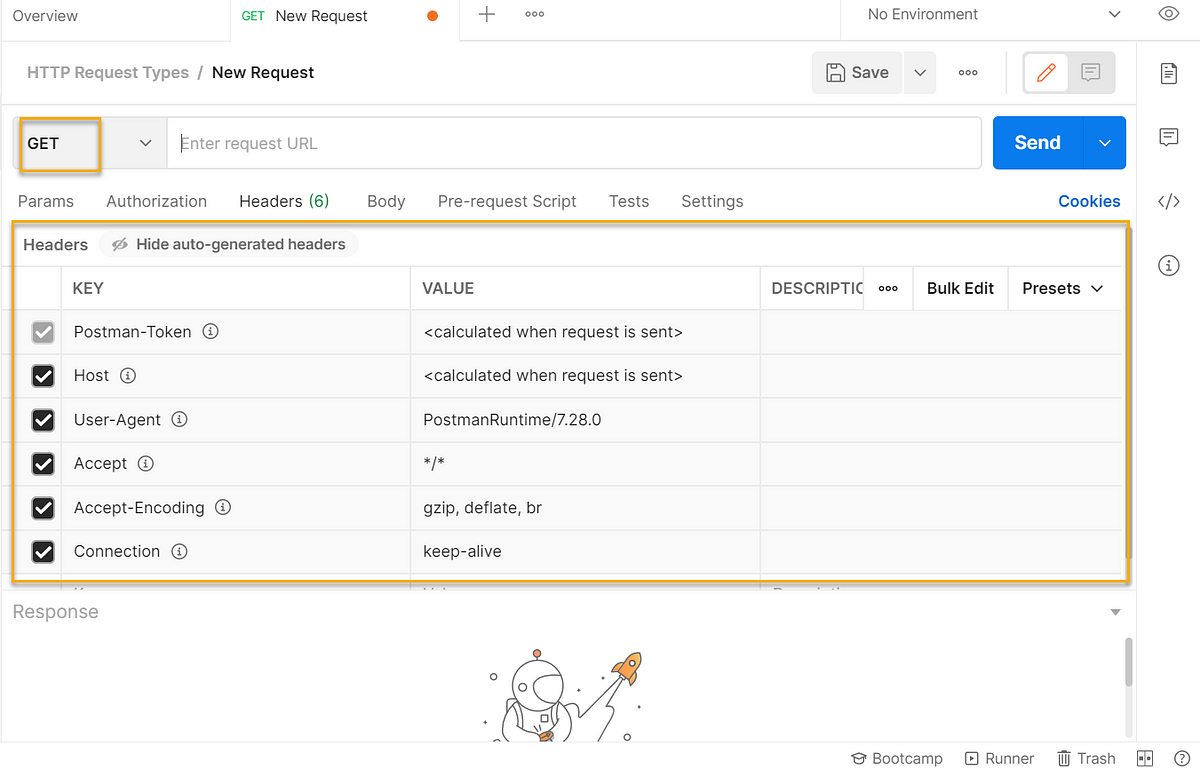
GET request:
GET request is actually used to retrieve/read data from the server.
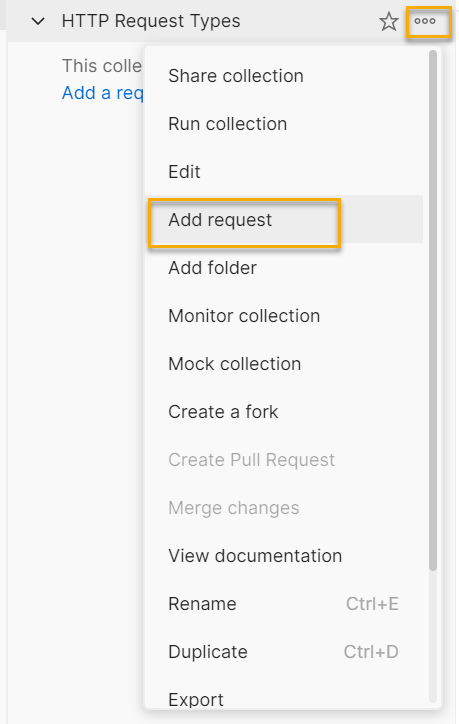
Create new request by selecting the three dots next to the collection name:
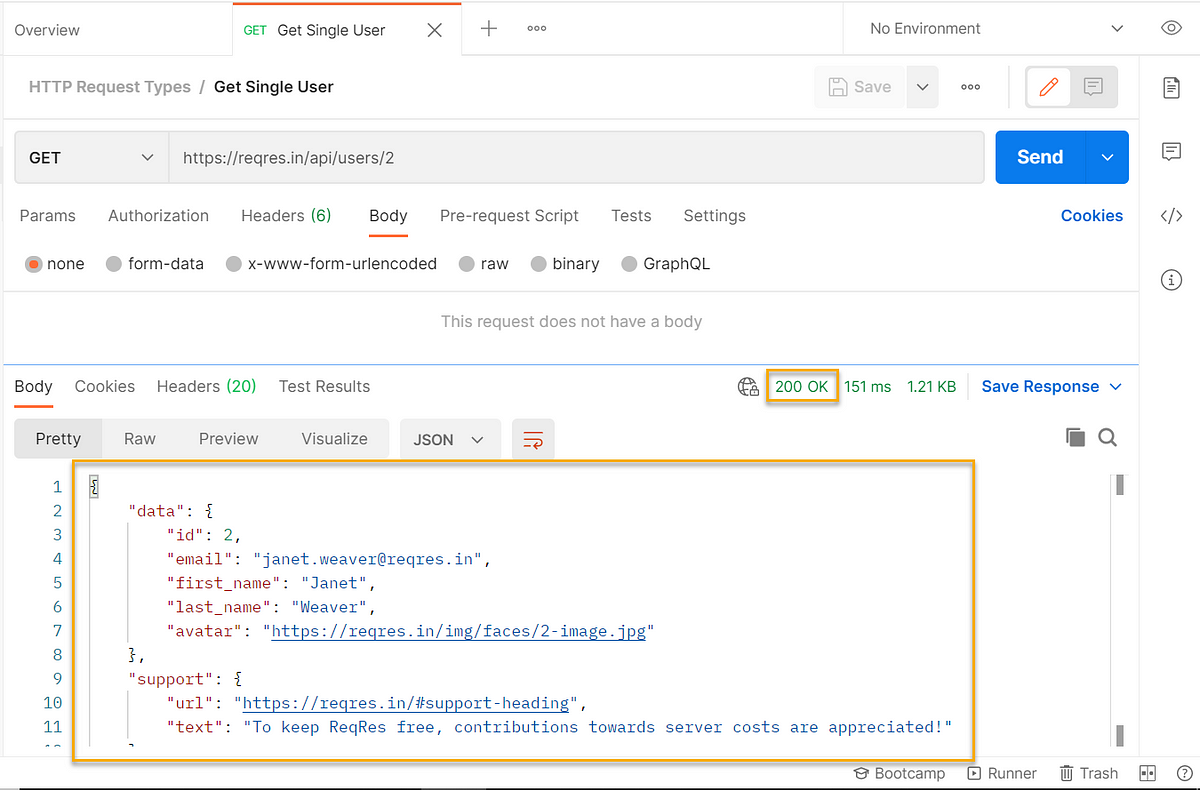
2. Postman generates the GET request type as default one and with default header values too. You can edit them based on your API documentation if needed
3. Add the request name and paste the URL “https://reqres.in/api/users/2" in the field next to the request type. This request doesn’t have any payload to be sent as part of “Body”
4. Click “Save” and “Send”
Ta-da!! We built our first request. We got the successful response back from the server.
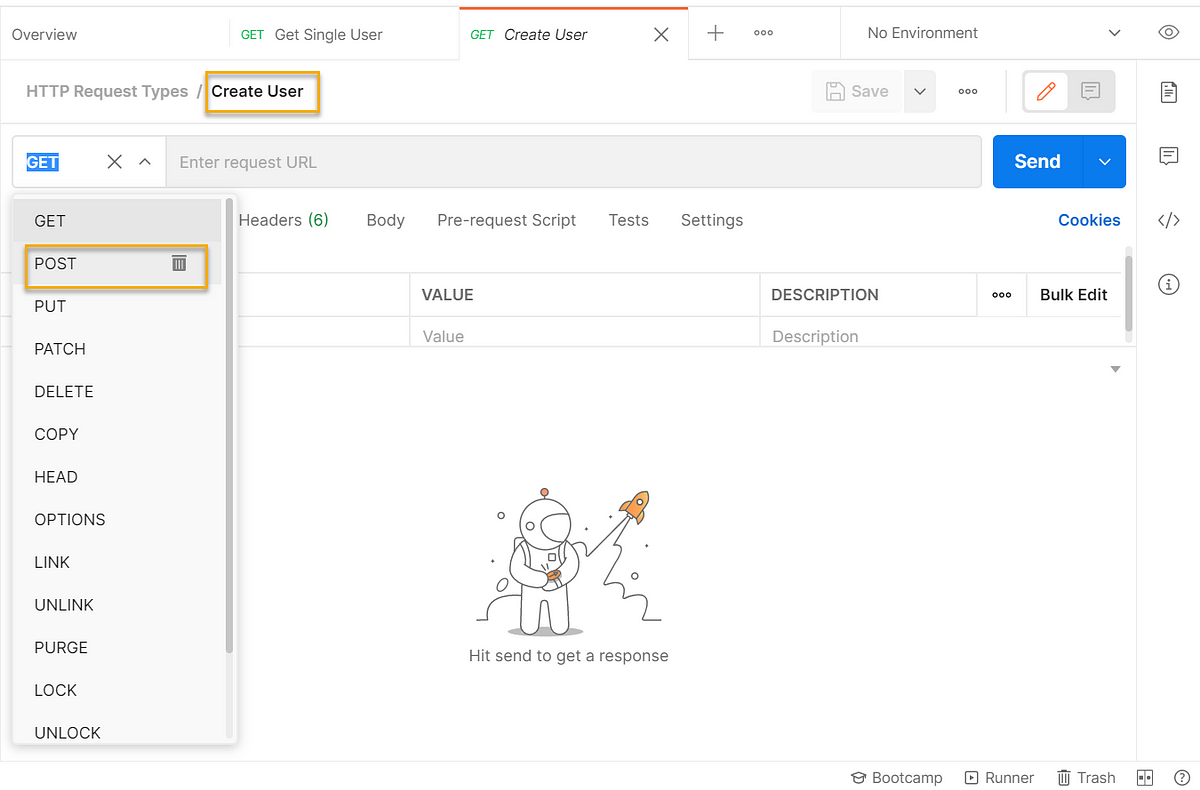
POST request:
It is the request type where need to send data to a server to create or update a resource (at times)
Same as above, create a new request and name it. Instead of default “GET” type, change it to “POST” method
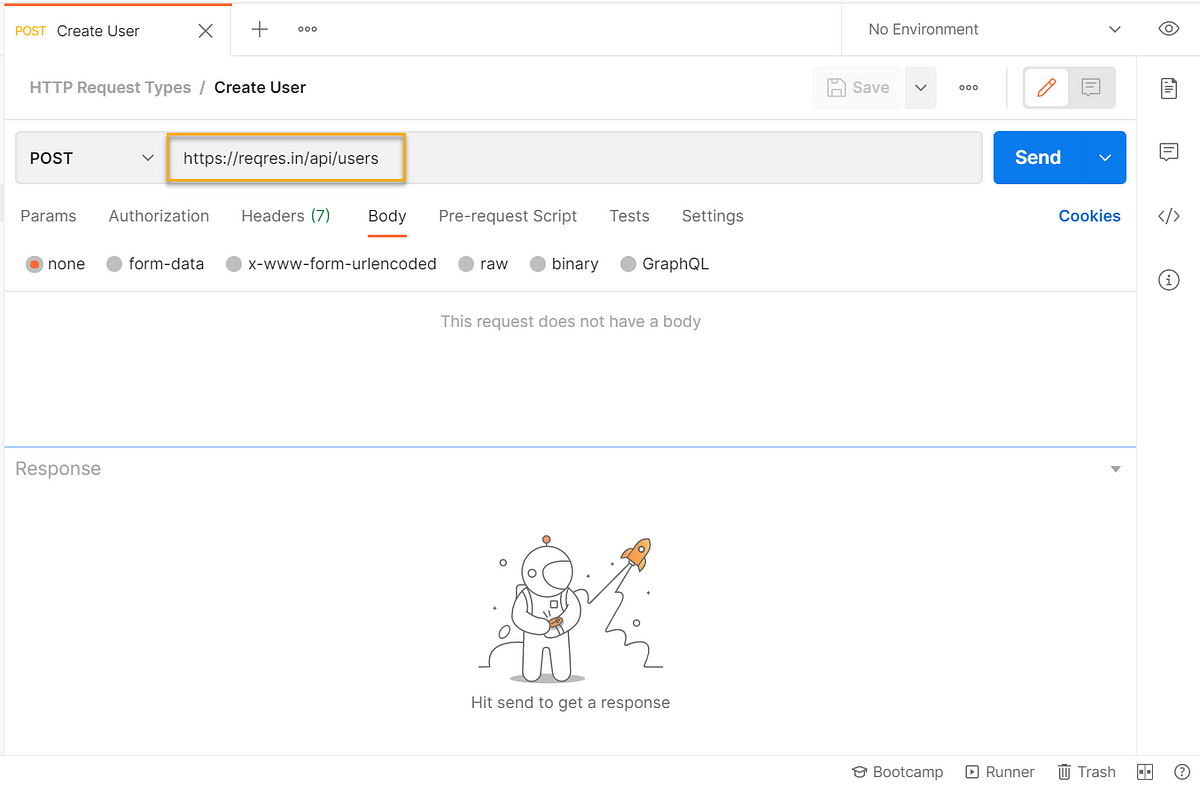
3. Since this is a POST request, it requires some Payload to be sent in the “Body” section
For example,
paste the below snippet under “Body”
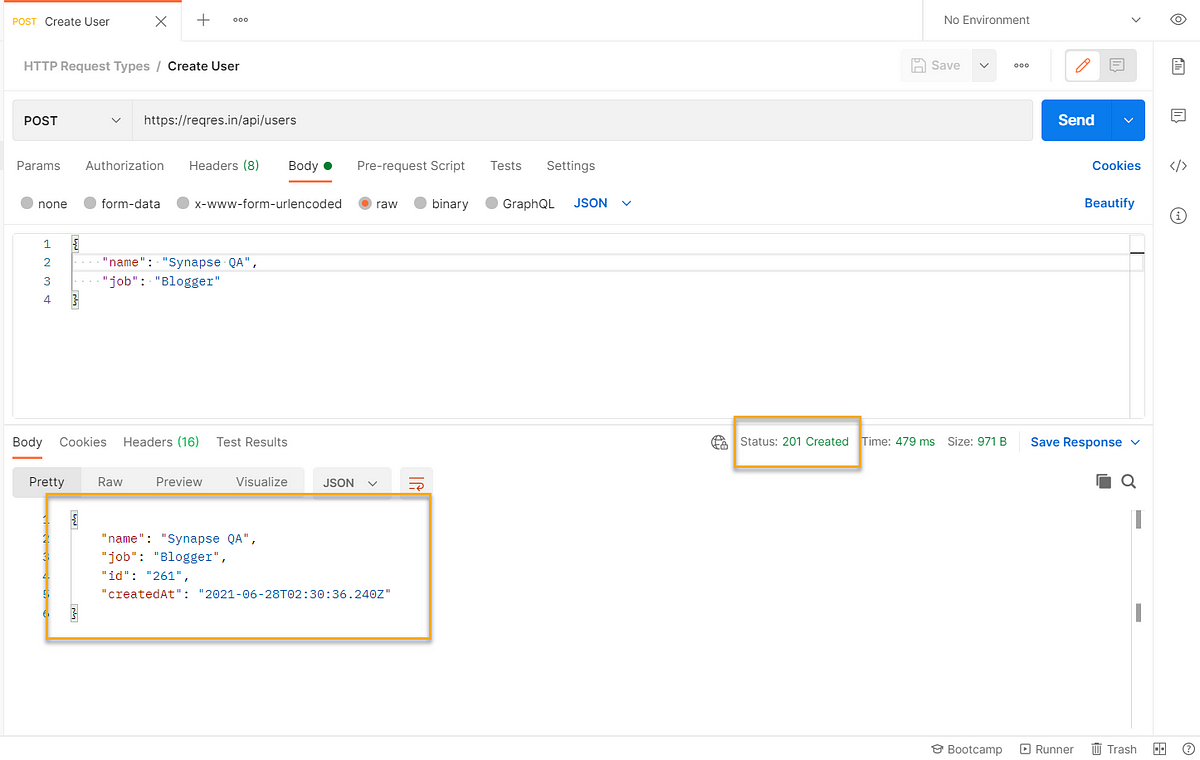
{
“name”: “Synapse QA”,
“job”: “Blogger”
}
4. Click “Save” and “Send”
We received a successful response back from the server and the user id is 261.
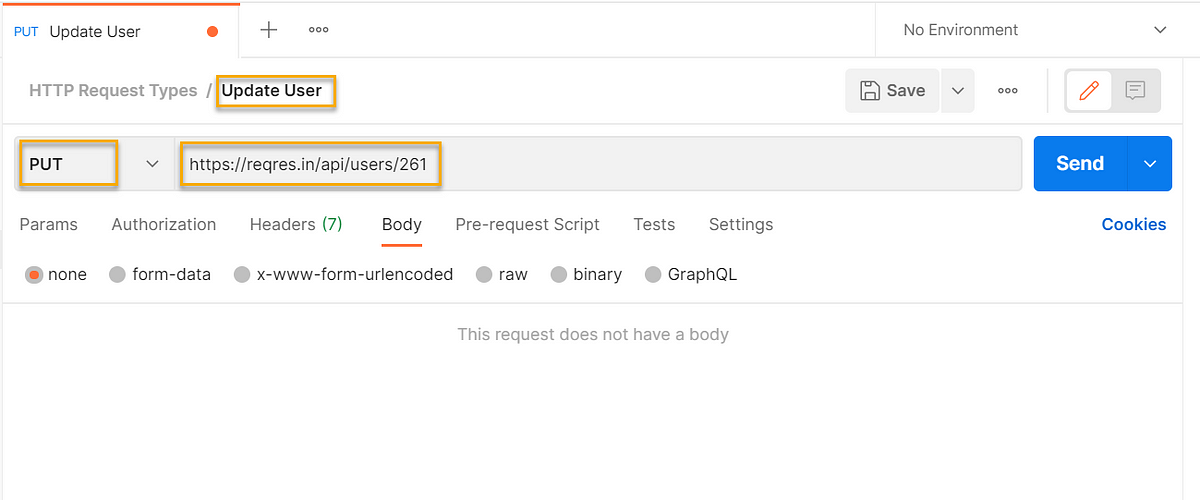
PUT request:
PUT request is used to update the existing resource/entity. Here we will try to update the same record which we created using the POST request recently.
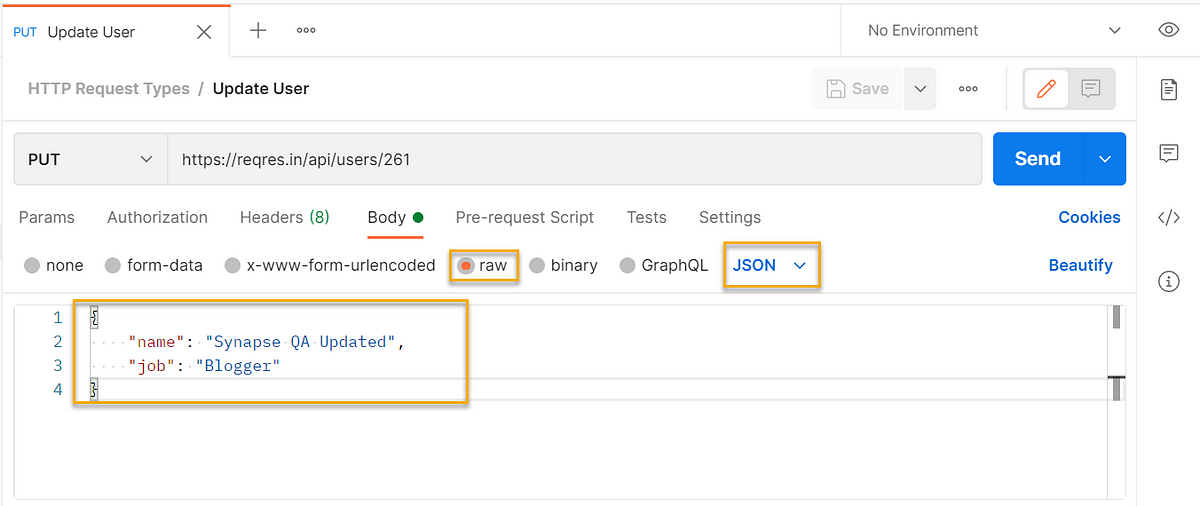
2. Now we are filtering the user id “261” in the URL. We also need to pass the updated data as part of the “Body”
{
"name": "Synapse QA Updated",
"job": "Blogger"
}
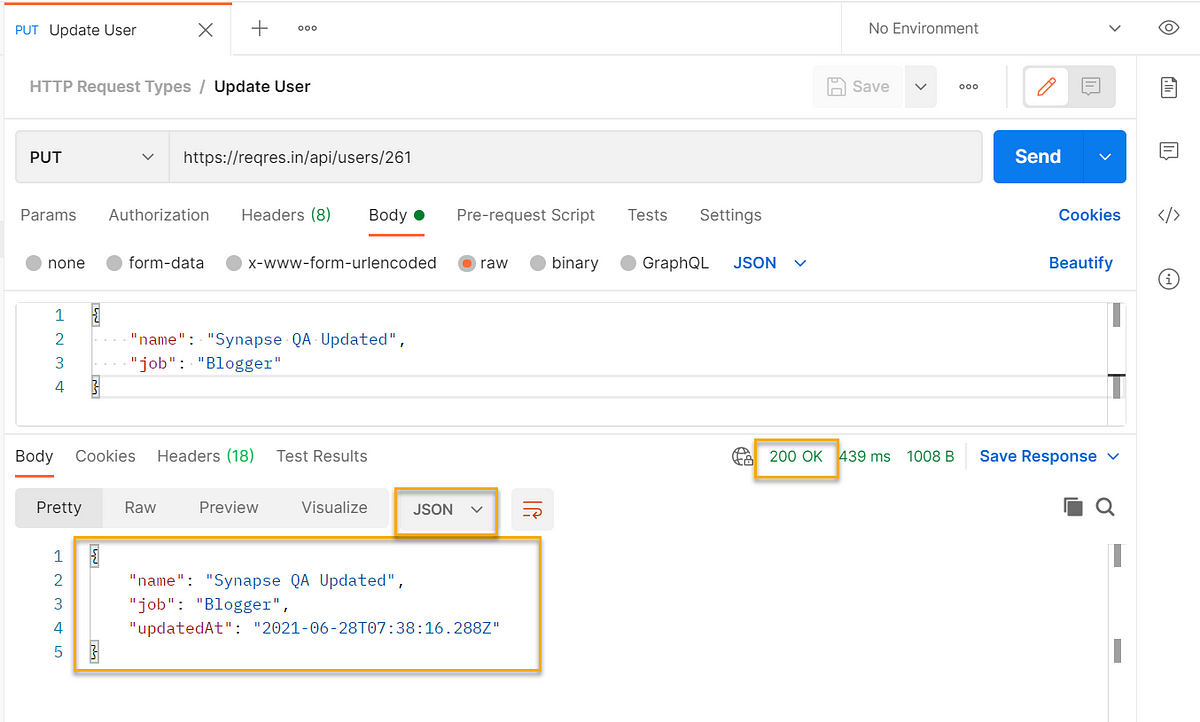
3. Click “Save” and “Send”
Now see that the entity is updated as expected.
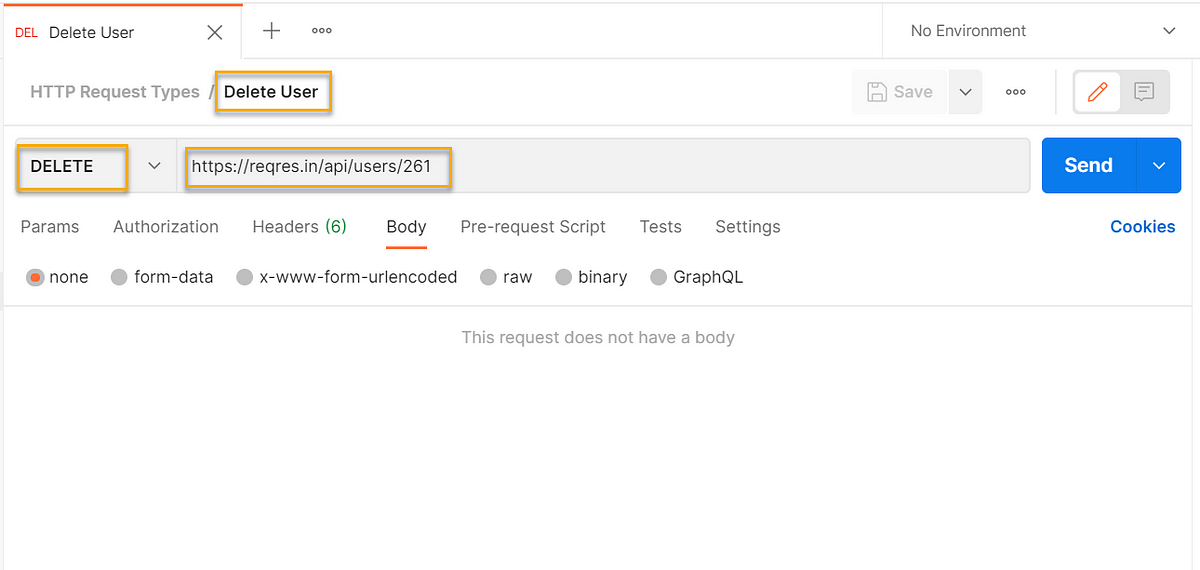
DELETE request:
The DELETE request method is used to delete/remove the resources mentioned in the URL.
We will delete the same user which we created using the POST request.
Creating a new request and name it, change the request type to “DELETE”. And paste the URL “https://reqres.in/api/users/261". Generally, the “DELETE” will not have any payload
2. Click “Save” and “Send”
We received the response 204 error code, where server has successfully fulfilled the request and there is no additional content to send in the response payload body. Some APIs will show message like that the “User is deleted”.
We learnt how to build the different HTTP requests and received the response codes/response back from the server.
So now we read about the frequently used HTTP requests types (GET, POST, PUT and DELETE) and how to build them in Postman. The same way you can try with other request types and practice more. This is the basement for testing your APIs. It will help you to convert the API documentation into API requests, which in turn will help you to understand better about your API capabilities. Hope you have learnt something new in two different tools for today.


Very Helpful Pricilla...
ReplyDeleteThank you so much..!!