Search This Blog
Hello there, warm Welcome :-) I am trying to share the knowledge and cool things I learnt during my QA journey!! I hope you find something interesting here :-)
Featured
- Get link
- X
- Other Apps
What are the types of Authentication for your APIs? How to configure that in Postman?

When you start working with third-party APIs, you would have noticed different API authentication methods. This will provide you the authorization for accessing those APIs.

Most frequently used methods are
- Basic authentication: As the name suggests, it is the basic method. Username and Password combo is sent with every API call
- API Key: A unique key is generated for your account which you need to pass it with every request
- OAuth: When user clicks on a sign-in button, grants permission, and your app can authenticate each request with an “access_token”
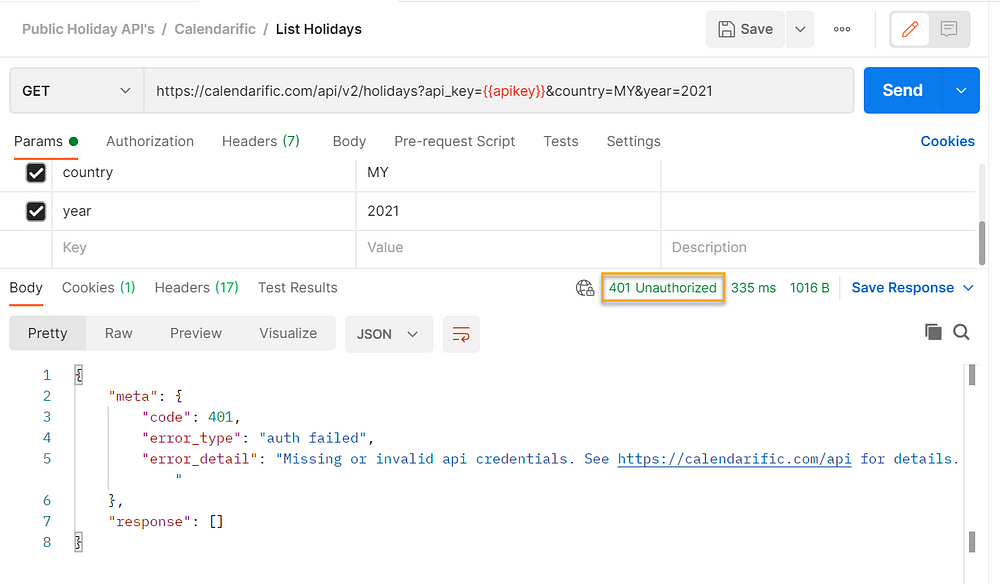
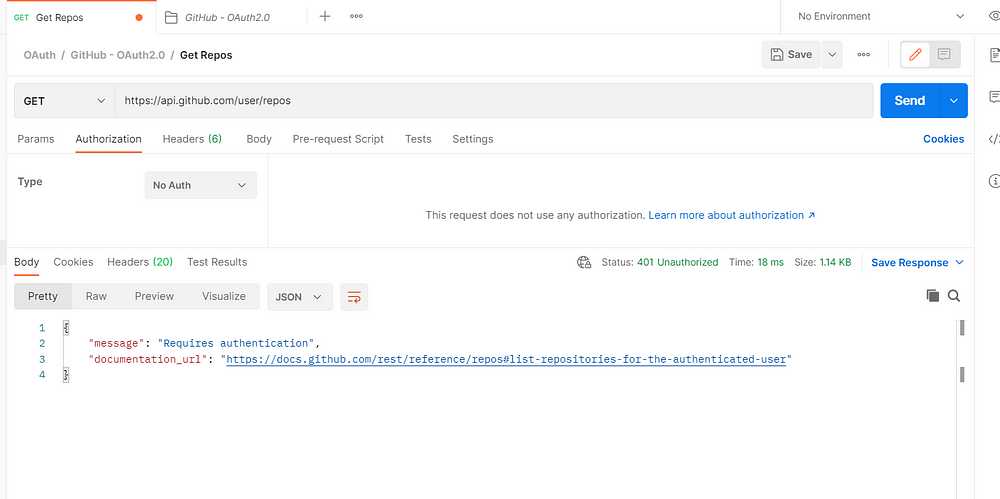
After adding all the details to your request on clicking send we might have received the “401 Unauthorized”. Have you ever faced it? Now you can relate that this is due to the missing authentication details for accessing that API.

You are aware of the types of authorization, now you are so curious to learn how the auth types are defined in Postman.
In Postman, you can see the “Authorization” section in three levels: Collection, Folder and Request. This means that you if have a certain list of API requests following the same auth type and details you can make a single folder for them and define the Authentication details in the folder level.
If the Authentication details are same for the complete collection, you don’t need to provide them in the folder/request level, you can select the authorization type and add the details to the collection level, which is applicable for the every folder/request under that collection.
There are many auth types supported by Postman.

It is always better to store the values related to authentication as variables in postman. You can read this to know more about the variables types in Postman read this blog. We can see in detail with example APIs that how these three types of authentication is handled in Postman.
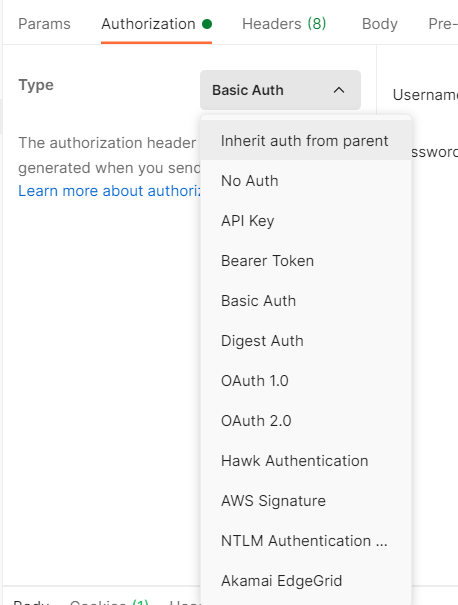
1. Basic Authentication:
Build a request using the below details:
Method: GET
Endpoint: https://postman-echo.com/basic-auth
Authorization Type: Basic Auth
Username: postman
Password: password
Save the details and click “Send”
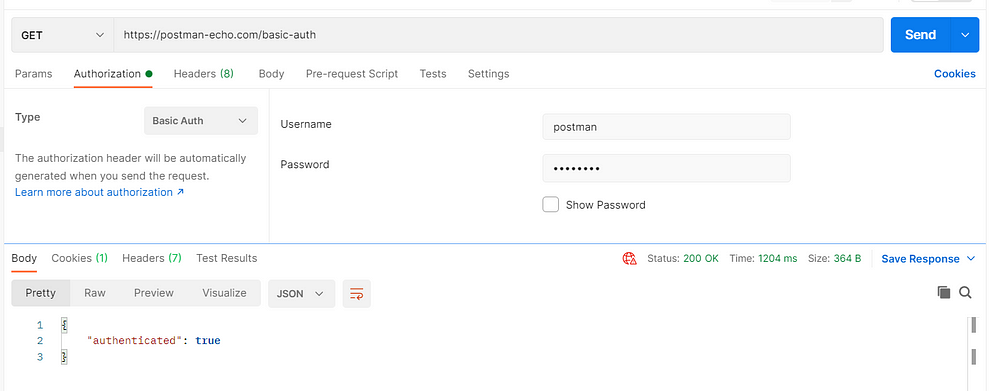
So this is is the easiest and pretty straight forward approach.
2. API Key:
Generally API key is passed along the URL.
You need to first generate the API Key for your account.
For example, consider the “Calendarific API”, this provides the list of public holidays based on the country code. These are the endpoints available:
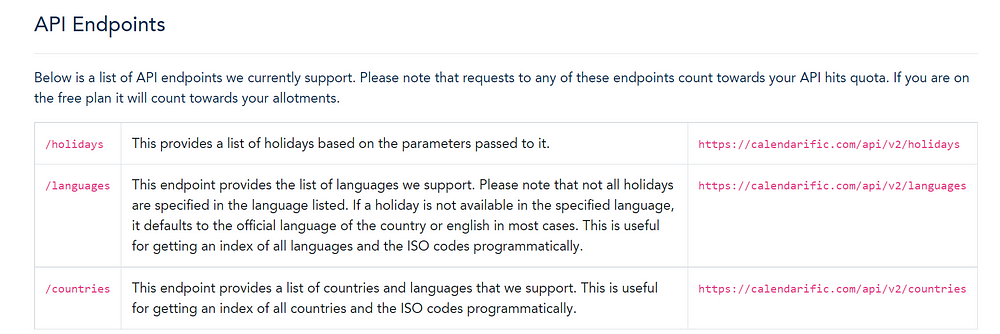
Under Authentication details, you see the details like below:

Once you signup and create an account, you can generate the API key,
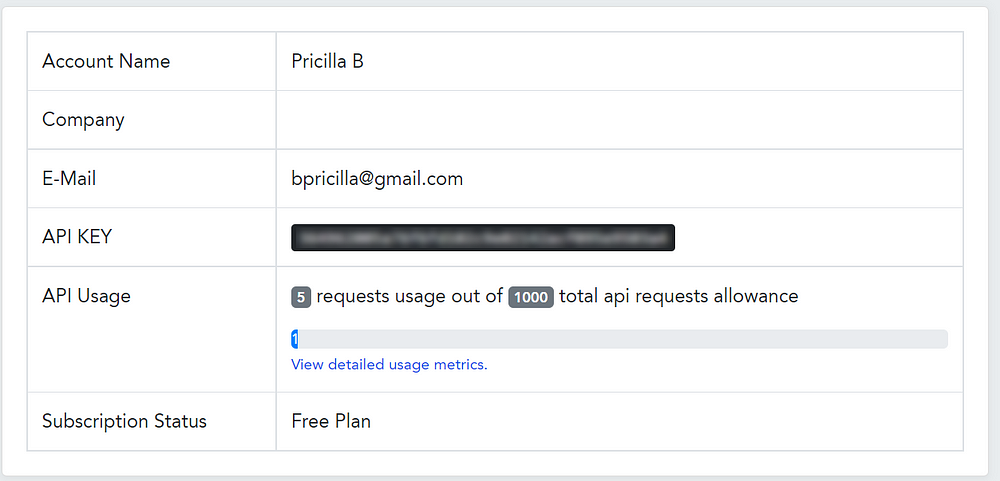
Now you need to copy this API key because this values needs to passed as part of every request. So better create a variable for the API Key as api_key in environment/collection level. In Postman we create a collection so that we can go ahead and create multiple requests under it. If you have any doubts/queries here on creating the workspaces/collections please read this blog.
- Create a new GET request for getting the list of country codes.
URL: https://calendarific.com/api/v2/countries?api_key={{api_key}}
To confirm if the api_key is stored and retrieved properly you can hover over the variable name link as below:

Response looks like below:
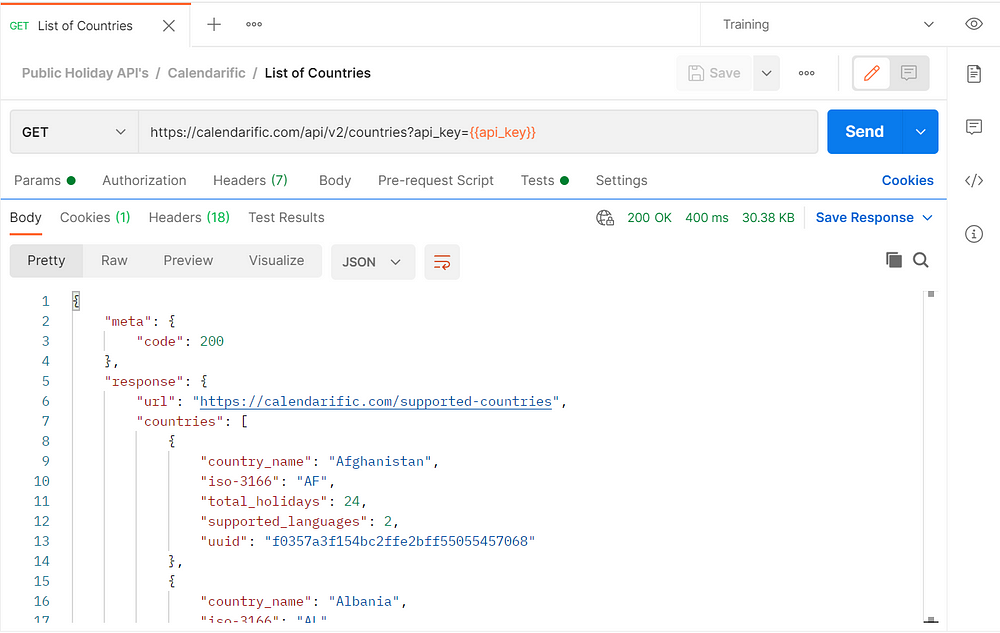
Field name “iso-3166” contains the two letter country code which is again passed to another request to get the list of public holidays.
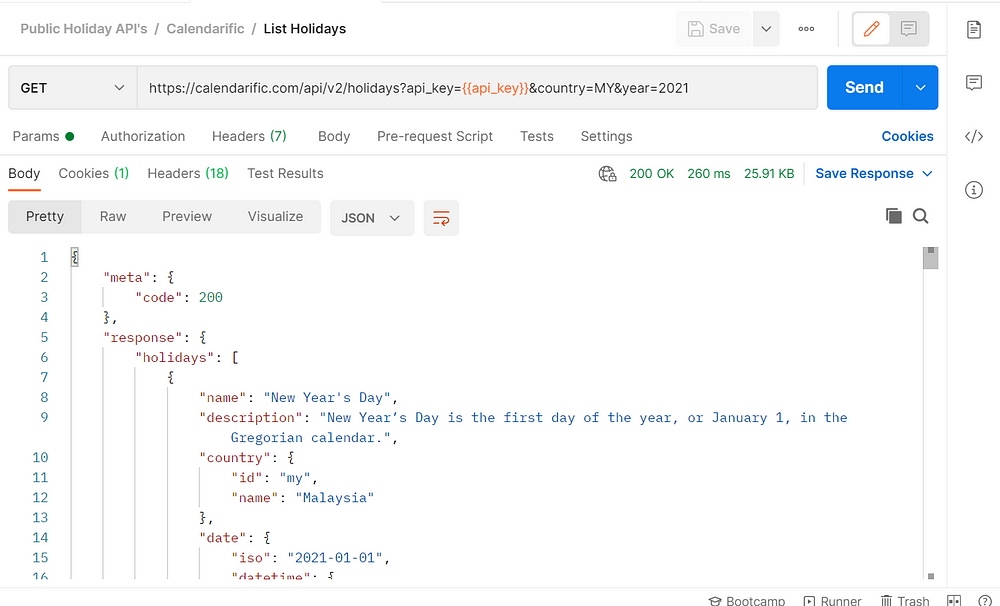
URL: https://calendarific.com/api/v2/holidays?api_key={{api_key}}&country=MY&year=2021
In the above URL, I have used country code as MY which indicates Malaysia.
Now, the response is as below:
If the api_key is not valid/empty appropriate error code is returned.
3. OAuth:
Using OAuth 2.0, access token is retrieved for the API at first, then the same token is used to authenticate future requests. Accessing data via the OAuth 2.0 flow varies greatly between API service providers, but typically involves a few requests back and forth between client application, user, and API.
Let’s see how OAuth authentication is used in GitHub API.
- Using this link we need to create an OAuth application in GitHub https://docs.github.com/en/developers/apps/building-oauth-apps/creating-an-oauth-app
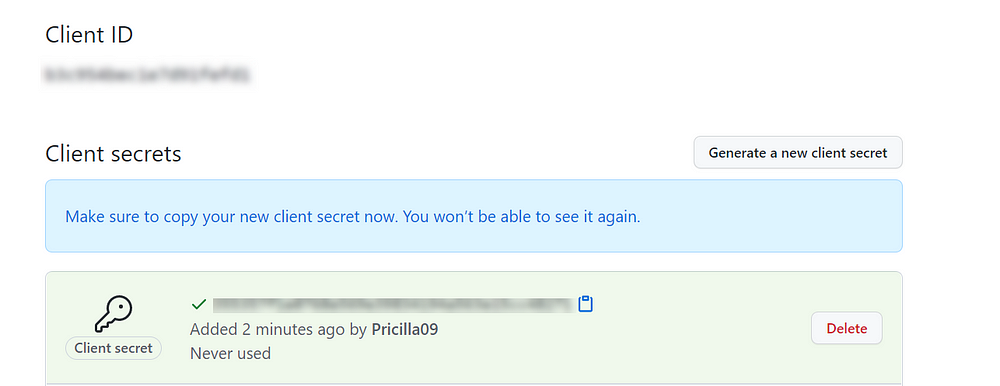
Application name field is user related, you can customize this based on your projects, flows etc. Homepage URL can have any detail. For Authorization callback URL provide the below value: https://oauth.pstmn.io/v1/browser-callback. Once you finish creating the application, Client ID and Client secret values will be generated, make sure to copy those details. Specially for Client secret need to copy to clipboard as soon as it is created, else it will be masked and you need to create a new Client secret.
2. Create a new collection named “OAuth” in Postman, and create a new folder/request inside it to get the repos for your GitHub account using OAuth2.0

3. Select the folder level, under “Authorization” tab, now select “OAuth 2.0” and provide the below values:
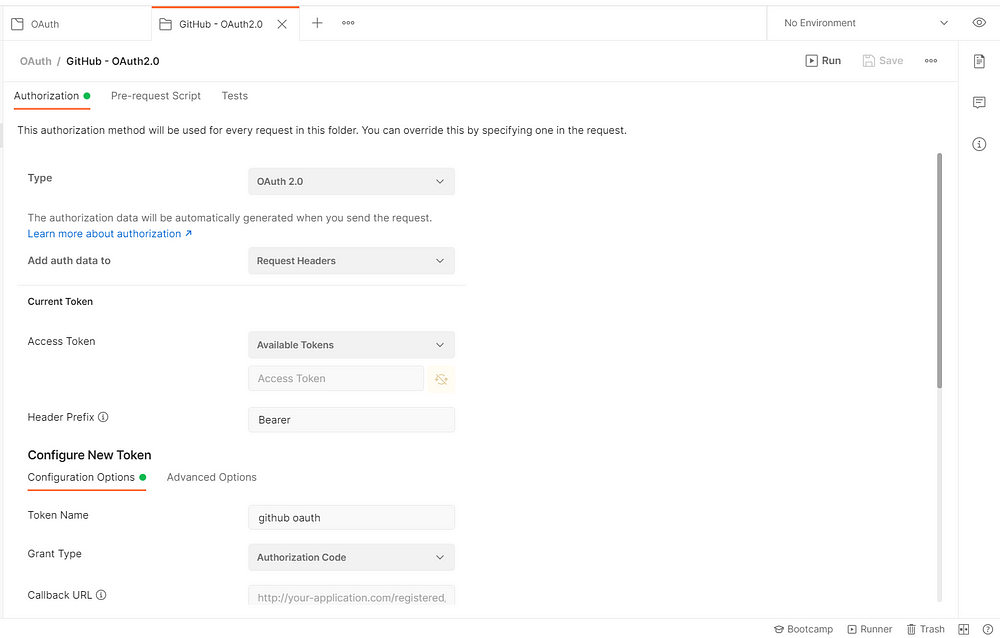
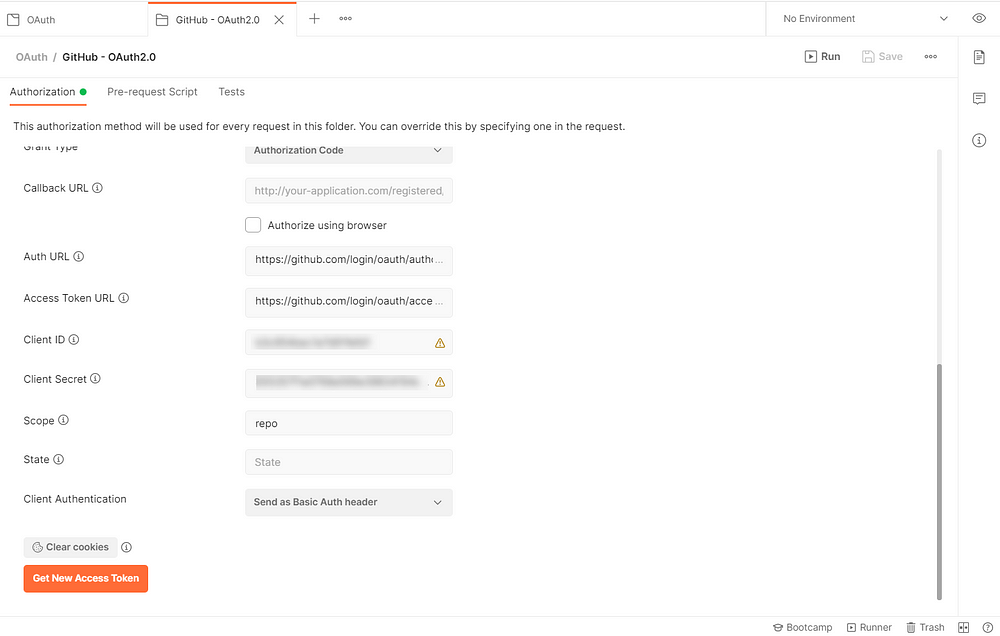
Please check here for getting the list of scope values:
When setting up an OAuth App on GitHub, requested scopes are displayed to the user on the authorization form. If your…docs.github.com
4. Click “Save” and “Get New Access Token”
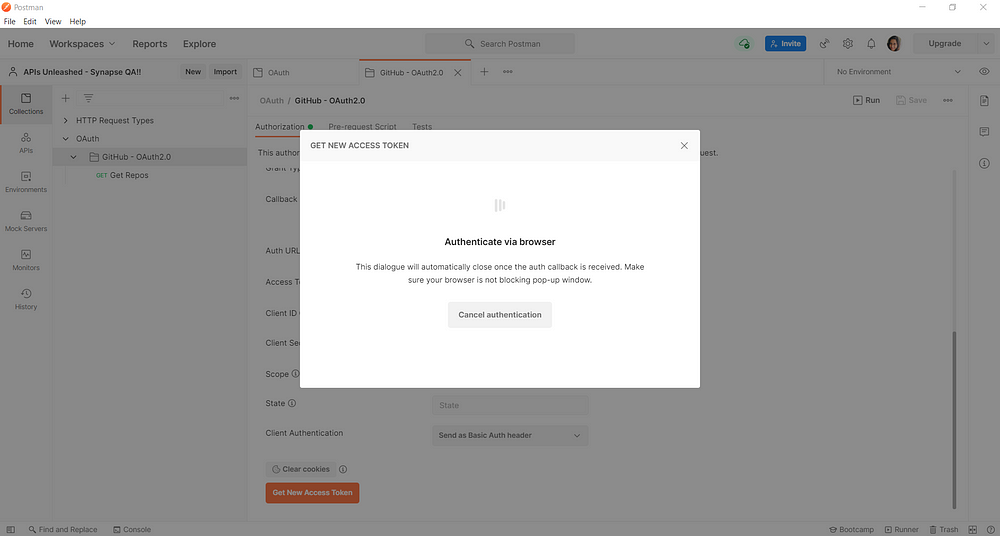
For the first time, you need to provide the log-in details for GitHub and once the application is authorized, you can see the new token.
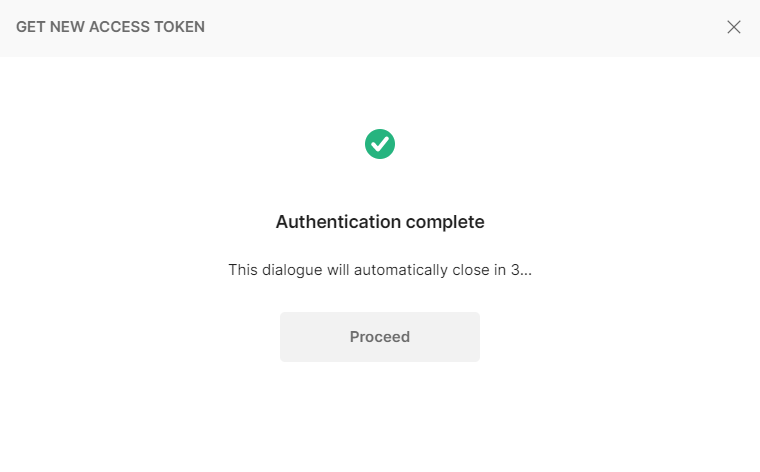
5. Click “Use Token”
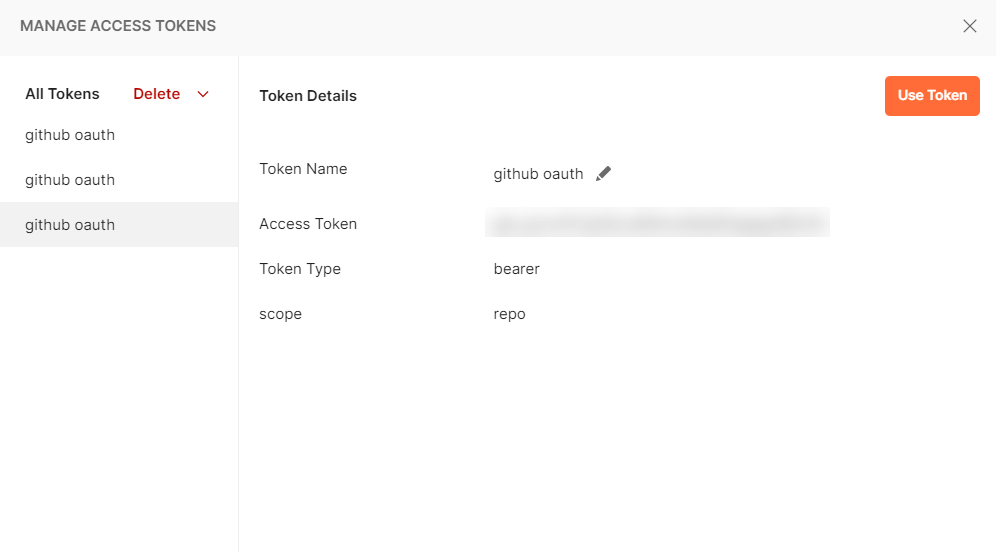
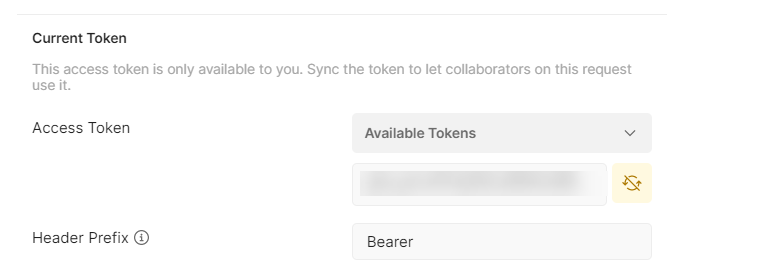
And you can see the same toke value is added to the “Access Token” field.
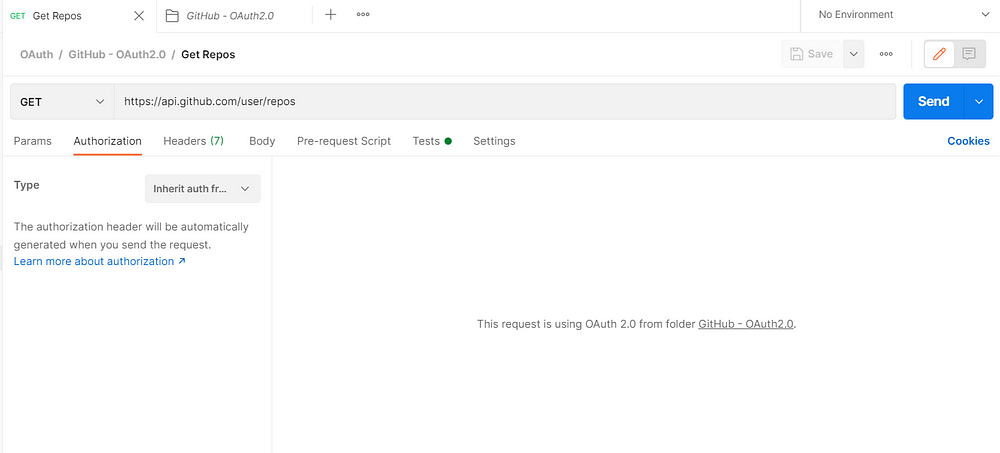
6. For the further requests under this collection, make sure to select the Auth type as “Inherit auth from parent”. Create new request “Get Repos” with endpoint: https://api.github.com/user/repos
7. Click “Save” and “Send”, the response looks like below
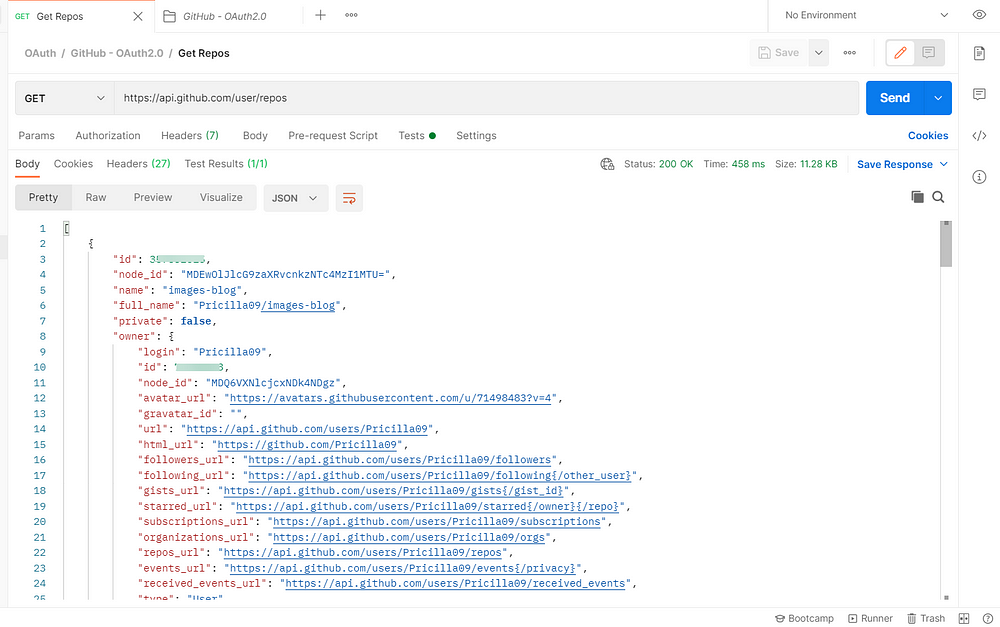
We have just tried one sample end point for GitHub API, you can try adding multiple requests under the same collection and make sure to select the authorization type as “Inherit auth from parent”, else you will receive “401 Unauthorized”
This is how we will can configure/use different Authentication methods for accessing the APIs. You can try exploring the other methods, mostly the API documentation should have all the details. Remember this is the first step and once you are able to get the access, you can then start to play around the other endpoints/capabilities for your API. I hope you never worry about the “401 Unauthorized” error hereafter, because you know the source and you can try to fix it.
See you all soon in another post!!!

— — — — — — — — — — — — — — — — — — — — — — — — — — — — — — — — — — —
Originally posted in https://synapse-qa.com/2021/07/22/apisunleashed-handling-authtypes/
- Get link
- X
- Other Apps
Popular Posts
How to handle SOAP API and parsing the response in Postman??
- Get link
- X
- Other Apps
How to handle REST API and parsing the response in Postman??
- Get link
- X
- Other Apps
Comments
Post a Comment